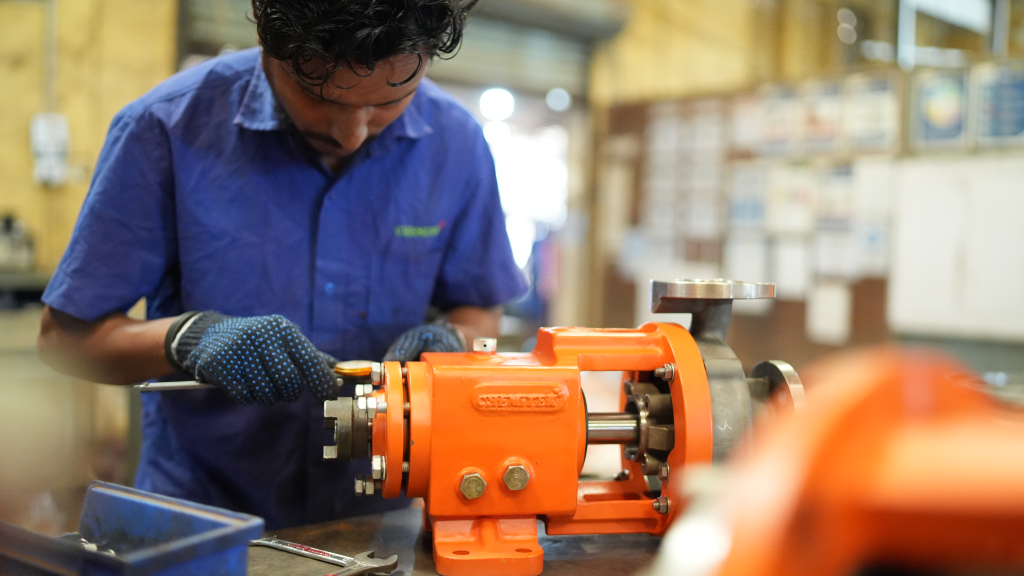
Pumps keep things running smoothly in industries, water supply systems, agriculture, and chemical plants. But even small issues can throw a wrench in your operations and rack up costs. That’s where proper pump repairing comes in.
Leaks, unusual noise, vibration, cavitation, or drops in pressure are often early signs that something’s off. Ignoring them can quickly lead to full-blown failures and expensive replacements.
In this guide, we’ll walk you through practical tips and troubleshooting for pump repairing so you can fix problems quickly, keep your pumps performing well, and avoid unexpected downtime.
Key Takeaways:
- Pump repairing includes inspecting parts, fixing leaks, adjusting impellers, checking alignment, and testing valves to keep pumps working reliably.
- Early troubleshooting prevents major failures, lowers repair costs, and ensures smooth operation.
- Key tasks involve checking vibrations, examining bearings and seals, inspecting shafts and impellers, and verifying electrical and mechanical connections.
- A structured repair routine includes quick fault detection, scheduled maintenance, and proper recording of repair activities.
- Following OEM guidelines and safety standards, using correct tools, replacing worn parts, and testing performance after repair keeps pumps running efficiently.
Timely pump repairing helps minimize downtime, maintain system efficiency, and extend pump lifespan, ensuring smooth and cost-effective operations.
Why Pump Repairing Matters for Smooth Operations?

Effective pump repairing is crucial to tackle issues early and keep systems running reliably. Proper pump repairing is essential to prevent major breakdowns and restore reliable performance. The importance of addressing these factors includes:
- Detecting vibration and unusual noise to identify worn bearings or misalignment.
- Inspecting seals and gaskets to prevent leaks and protect pump components.
- Examining impellers and shafts to ensure smooth flow and maintain consistent pressure.
- Testing valves and connections to keep system operation balanced.
- Monitoring electrical and mechanical parts to avoid unexpected shutdowns.
To keep your pump operating efficiently and minimize downtime, follow this essential pump repairing and troubleshooting steps.
Step-by-Step Pump Repairing and Troubleshooting Guide

Pump repair is crucial for maintaining reliable, efficient, and safe operation across industrial, agricultural, and utility systems. Following a structured repair and maintenance routine ensures longer pump life, reduces downtime, and improves overall system performance.
This 10-step guide provides practical instructions to inspect, troubleshoot, and repair your pumps effectively.
Step 1: Initial Inspection and Diagnosis
Before disassembling the pump, conduct a thorough visual and operational inspection to identify any early warning signs of trouble.
Look for:
- Fluid leaks around seals, gaskets, or piping can indicate worn or damaged components and may lead to pressure loss, contamination, or motor damage if not addressed promptly.
- Corrosion, rust, cracks, or surface damage on the pump body can weaken structural integrity, cause leaks, and reduce overall pump efficiency.
- Loose bolts, brackets, or misaligned couplings may result in excessive vibration, noise, or premature wear of bearings and seals.
- Noise, vibration, or irregular performance often signals internal issues such as cavitation, bearing failure, or misalignment that require immediate attention.
Result: Early detection prevents small issues from escalating into costly failures and helps prioritize repair actions.
Step 2: Check Mechanical Seals and Gaskets
Mechanical seals and gaskets are critical for maintaining pressure and preventing contamination. Damaged seals can cause fluid loss, bearing failure, or motor damage.
Inspection Checklist:
- Examine for wear, cracks, scoring, or deformation to ensure seals and gaskets are intact and able to maintain pressure without leakage.
- Check elastomers for swelling, compression, or chemical attack as these can compromise the seal’s effectiveness and lead to premature failure.
- Look for leaks, bubbling, or unusual noises that may indicate a failing seal, improper installation, or fluid contamination.
Repair Tip: Replace seals proactively with OEM or certified compatible parts rated for the specific fluid type.
Step 3: Inspect Bearings and Lubricate Moving Parts
Friction and wear are the main causes of bearing failure. Proper lubrication ensures smooth rotation, reduces heat, and prevents damage.
Key Practices:
- Use manufacturer-recommended grease or oil (e.g., ISO VG 68–150) to match the pump’s operating conditions and temperature range.
- Apply the correct volume; over-greasing generates heat and can damage seals, while under-greasing leads to metal-to-metal contact and accelerated wear.
- Record lubrication dates, type, and quantity for future reference and to maintain a consistent maintenance schedule.
Result: Bearings operate smoothly with minimal vibration, service life is extended, and mechanical failures are significantly reduced.
Step 4: Verify Pump Alignment and Couplings
Even minor misalignment increases vibration, wears seals faster, and wastes energy, potentially causing premature bearing failure and higher maintenance costs.
Inspection Techniques:
- Use laser or dial indicators to measure shaft alignment precisely and ensure both pump and motor shafts are co-axial.
- Check axial and radial vibrations using vibration meters to detect imbalance or misalignment early.
- Inspect couplings for wear, looseness, cracks, or excessive play that could compromise torque transmission.
- Examine mounting surfaces for unevenness or loosened bolts that may affect alignment.
- Check for thermal growth allowance if operating under fluctuating temperature conditions to prevent stress on shafts.
Result: Properly aligned pumps run smoothly, reduce mechanical stress, minimize seal and bearing wear, improve energy efficiency, and enjoy a longer operational life.
Step 5: Inspect Impellers, Casings, and Wear Rings
The impeller drives fluid flow, and any damage or wear can significantly reduce pump efficiency, increase energy consumption, and place additional stress on the motor and bearings.
Inspection Focus:
- Impellers: Check for corrosion, erosion greater than 2 mm, fouling, or debris buildup that can obstruct flow or cause imbalance.
- Casings: Inspect for cracks, leaks, or damaged coatings that may allow fluid loss or reduce hydraulic performance.
- Wear Rings: Look for excessive clearance, sharp edges, or wear that can compromise efficiency and allow recirculation inside the pump.
Repair Tip: Use high-quality OEM or certified replacement parts, thoroughly clean internal surfaces, and ensure proper reassembly to maintain optimal flow efficiency, prevent cavitation, and extend the pump’s operational life.
Step 6: Test Electrical and Motor Components
Even pumps that are mechanically sound can fail if their electrical systems are compromised. Ignoring motor or electrical faults can result in sudden breakdowns, overheating, or permanent damage to the pump and connected equipment.
Checks to Perform:
- Insulation resistance (megger test): Detects deterioration or breakdown in motor insulation
- Voltage and current balance across all phases: Prevents uneven load, overheating, and potential phase failure
- Motor winding temperature and thermal condition: Identifies early signs of overheating or insulation stress
- Functionality of thermal overload and protective devices: Ensures motors are protected from excessive current and heat
Result: Regular electrical testing prevents motor burnout, avoids phase imbalance, reduces unexpected stoppages, and enhances the overall reliability and lifespan of both the pump and motor.
Step 7: Monitor Noise, Vibration, and Performance
Abnormal sounds, vibrations, or drops in pump performance are early indicators of internal issues that, if ignored, can lead to major failures.
Result: By monitoring these indicators and addressing the underlying causes promptly, you prevent further damage, maintain consistent pump performance, and avoid costly unplanned downtime.
Step 8: Address Suction and Discharge Issues
Airlocks, suction leaks, or blocked discharge lines can significantly reduce pump efficiency and may lead to cavitation, which damages impellers and other internal components.
Key Tips:
- Ensure the pump has an adequate positive suction head (NPSH) to prevent cavitation and maintain consistent flow.
- Inspect suction and discharge piping for air pockets, blockages, or sediment buildup that can restrict fluid movement.
- Install foot valves, strainers, or air release valves where necessary to maintain smooth operation and prevent backflow.
Result: Proper management of suction and discharge ensures continuous fluid flow, protects internal pump components, and prolongs pump life by preventing cavitation and mechanical stress.
Step 9: Replace Worn Components
Bearings, seals, impellers, and couplings should be replaced before they fail completely to prevent cascading damage to other parts of the pump and connected systems.
Tip: Always use OEM, ANSI/ASME B73.1 or certified equivalent parts to ensure proper fit, material compatibility, and long-term reliability.
Result: Minimizes unexpected downtime, prevents secondary failures in related components, maintains optimal pump performance, and ensures uninterrupted system operation.
Step 10: Maintain Detailed Repair and Maintenance Logs
Accurate documentation is essential for predicting failures, monitoring component life, and planning preventive maintenance.
Include:
- Inspection Dates and Observations: Record when inspections were performed and note all findings, including visible wear, leaks, or unusual performance.
- Vibration, Temperature, and Lubrication Measurements: Track key operational parameters to detect trends or deviations that may indicate impending failure.
- Parts Replaced with Serial Numbers or Batch Details: Note all replaced components, including manufacturer details and installation dates, to track life cycles.
- Performance Anomalies and Corrective Actions: Document any abnormal behavior, troubleshooting steps taken, and follow-up results to support continuous improvement.
Result: Maintaining comprehensive logs allows operators to anticipate problems, schedule timely interventions, improve system reliability, extend pump lifespan, and make informed, data-driven maintenance decisions.
Once repairs and inspections are complete, knowing common challenges and following best practices is key to ensuring long-term pump reliability.
Best Practices and Common Challenges in Pump Repairing
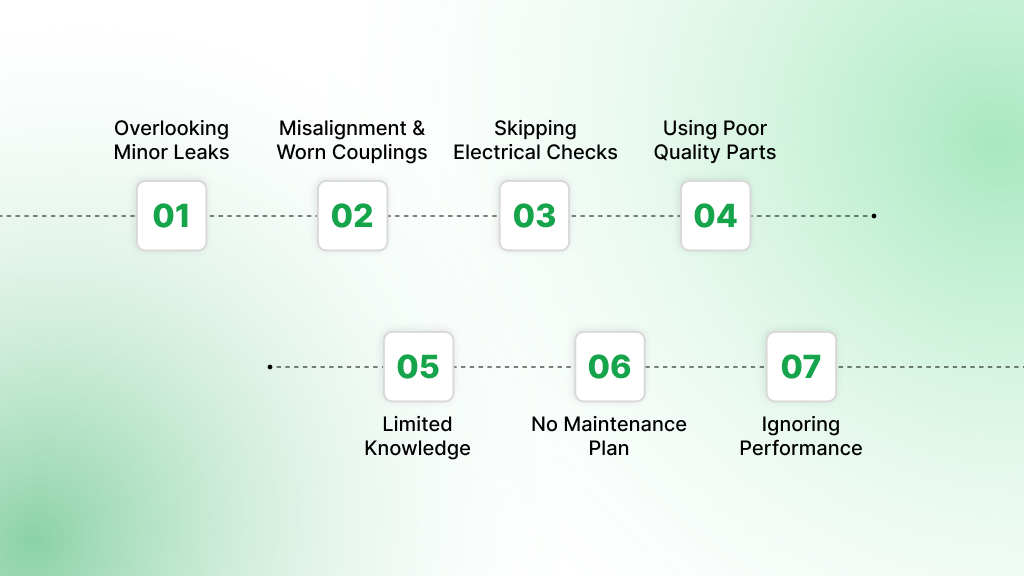
Even small issues such as leaks, unusual vibration, or worn parts can escalate into major failures if left unattended. Many operators may overlook early signs, leading to costly downtime.
Below is a detailed look at typical challenges in pump repairing and practical steps to maintain reliable performance.
1. Overlooking Minor Leaks or Vibrations
Small leaks or subtle vibrations often indicate worn bearings, seals, or couplings. Ignoring them can cause serious damage and unplanned downtime.
Best Practice: Check pumps regularly for leaks and vibrations. Use visual inspections or vibration sensors to spot problems early and fix them promptly.
2. Misalignment and Worn Couplings
Shaft misalignment or worn couplings can lower efficiency and increase wear on other components.
Best Practice: Verify shaft alignment during scheduled maintenance. Replace damaged couplings and use proper alignment tools to ensure smooth operation.
3. Skipping Electrical Checks
Electrical issues, such as insulation failure or voltage imbalance, can result in motor burnout or sudden shutdowns.
Best Practice: Perform routine electrical tests, including insulation resistance and amp draw. Ensure grounding, secure connections, and functional overload protection.
4. Using Poor-Quality Replacement Parts
Non-OEM or low-quality parts may not fit properly, reducing pump lifespan and efficiency.
Best Practice: Always choose OEM or approved equivalent parts. Check compatibility, size, and material specifications before installation.
5. Limited Operator Knowledge
Lack of training can lead to misdiagnosis, improper repairs, and extended downtime.
Best Practice: Provide hands-on training for operators and technicians. Focus on troubleshooting, handling seals and impellers, electrical testing, and identifying early signs of wear.
6. No Preventive Maintenance Plan
Waiting for a pump to fail before repairing it increases risk and repair costs.
Best Practice: Create a preventive maintenance schedule based on pump type, operating hours, and workload. Record all inspections, repairs, and replacements systematically.
7. Ignoring Performance Monitoring
Without checking flow, pressure, or vibration, minor problems can go unnoticed until they cause failure.
Best Practice: Install gauges and sensors to track key parameters. Compare readings with baseline values and investigate any significant changes immediately.
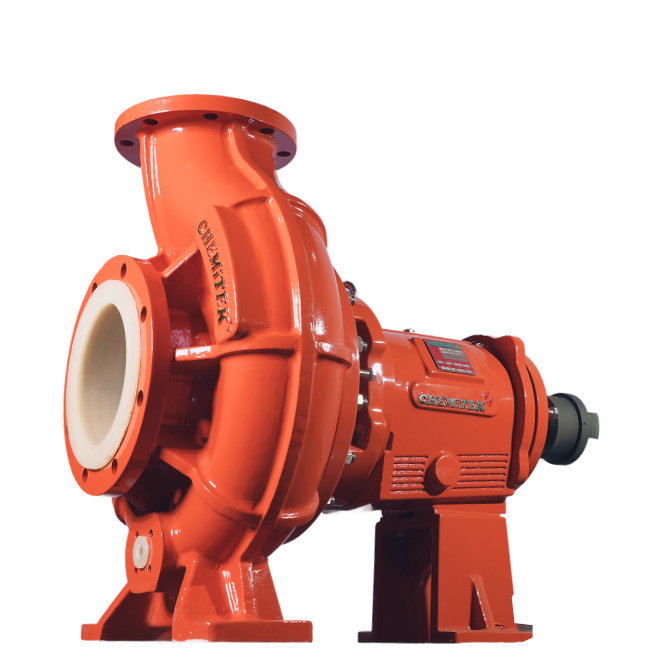
Looking for reliable pumps for your operations? Discover how Chemitek delivers high-quality pumps built for efficiency and long-lasting performance. Explore our range today.
Chemitek: Engineered for Top Pump Performance
At Chemitek, we deliver comprehensive pump repair and maintenance services designed to keep your industrial, agricultural, and utility systems running smoothly.
For years, we have assisted operators in tackling common pump issues, including leaks, faulty seals, misaligned shafts, and worn-out parts. Our solutions focus on minimizing interruptions, restoring optimal water or fluid flow, and extending pump life.
Reach out today to implement a tailored pump repair and maintenance plan that meets your operational demands.
FAQs
1. What is the most important step in pump repairing?
The most critical step is a thorough inspection of all key components, including seals, bearings, impellers, and couplings. Identifying wear or damage early allows you to prevent unexpected failures, maintain efficient operation, and avoid costly downtime.
2. How often should pumps be serviced or repaired?
Service frequency depends on the pump type, operating hours, and application. Generally, visual inspections should be performed weekly, lubrication and seal checks monthly, and detailed internal inspections quarterly. Pumps in seasonal or high-demand operations may require additional checks before and after peak use.
3. Why does my pump vibrate after repair?
Post-repair vibration often results from shaft misalignment, improperly installed bearings, worn couplings, or cavitation caused by flow issues. Verify alignment, inspect moving parts, and ensure proper installation of all components to eliminate vibration.
4. Can I use non-OEM parts for pump repair?
While non-OEM parts may be cheaper, they often do not meet the precise tolerances and material requirements of your pump. Using OEM or certified equivalent parts ensures proper fit, compatibility, and reliable long-term performance, particularly for critical or high-pressure applications.
5. What are early signs of pump failure?
Early warning signs include leaking seals, unusual noise, abnormal vibration, lower-than-normal flow, pressure drops, or motor overheating. Regular monitoring and prompt troubleshooting of these symptoms can prevent major breakdowns and extend pump life.
Latest posts
Pump Repair: Essential Tips and Troubleshooting Guide
Ready to Upgrade Your Process Operations?